You’ve headed to the backyard and are looking around. You feel something is missing. Your garden is flourishing, the birds are chirping, and your deck is complete. But the deck seems a little too open. What might make this feel complete or fuller? A comfortable area you want to visit daily? Table and chairs? An umbrella? Wait, a Vita pergola. Yes! ☺

Ask yourself…
Now, before deciding on the pergola of your liking, you’ll need to make sure your yard will accept it. Ask yourself, is there enough room? Where on my deck would this look perfect? These questions may seem easy enough to answer, but planning is crucial. Since you have chosen to have it installed/assembled on your deck, will it interfere with anything? Will it obstruct other features of your deck or yard? Does it restrict access to areas you need to get to? These same questions can be asked if you would like it placed in your yard as well.
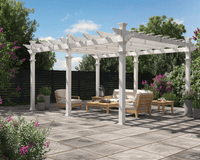
For this conversation, we will choose our standard flattop pergola called the Venetian. It is a 10’ x 10’ White pergola with standard shade slats above. A great pergola choice for the DIY-er with limited backyard or deck space, but would like to add a bit of décor and style.
Will this be assembled close to any existing permanent structures? The house, garden beds, planters, shed, fences? The pergola would look great “there” but, will it block a window or doorway? “That spot” looks great, however, it may be too close to the fence. Taking these into account makes for good planning. Once you have found the perfect spot, where its functionality and style will accent the rest of the yard and provide shade while sitting on your deck. You are ready to begin the assembly process.
Post Placement
When planning for the post placement, you must also remember that there will be a bit of an overhang of the top portion of the pergola. Placing the posts too close to a house or other structure could prevent you from achieving symmetry. The rafters may be too close to the house and prevent you from installing the pergola end caps. These items will overhang the pergola footprint by more than a foot in most cases.  Since we are putting this on a deck, Bolt Down Brackets will be needed for stability and strength. These can be purchased through us directly at wearevita.com and are designed for our pergolas. If you have access to the underside of your deck you will need to add extra blocking for the brackets to have a stable and strong hold to support the entire pergola. This will be the same for all posts. See our Bolt Down Bracket video. If your deck is closer to the ground, and gaining access to the underside is too difficult, you will need to remove a few of the deck board(s) where the posts will be placed, you can then add the extra support outlined in the video.

Assembly
You have now made these modifications to your deck and are one step closer to enjoying your backyard deck with a beautiful new Vita pergola. Following the assembly instructions from this point carefully, will provide a smoother and error free experience. You can also view our fly-through video of the Venetian pergola by clicking here. Our instructions are also available to download via our website.
Our customer service team is here to assist you with anything you may need. By calling 1 800 282 9346, you will be in direct contact with Vita and our specialists to make your experience an enjoyable and also an educational one. We can also be reached via email at hello@wearevita.com.
Good luck on the next stage of your project. And, have fun. Making your house and yard beautiful should not feel like a chore.
Pete,