The first thing you will want to do is measure and mark out the location of the bolt down brackets using string or chalk line. Diagonal distances must be the same to ensure a square installation. Adjust string lines accordingly. The inside corner of the string lines will be the corner of the bottom flange of the bolt down bracket. Ensure that when you are measuring between the bolt down brackets you are measuring from the bottom flange of the bracket.
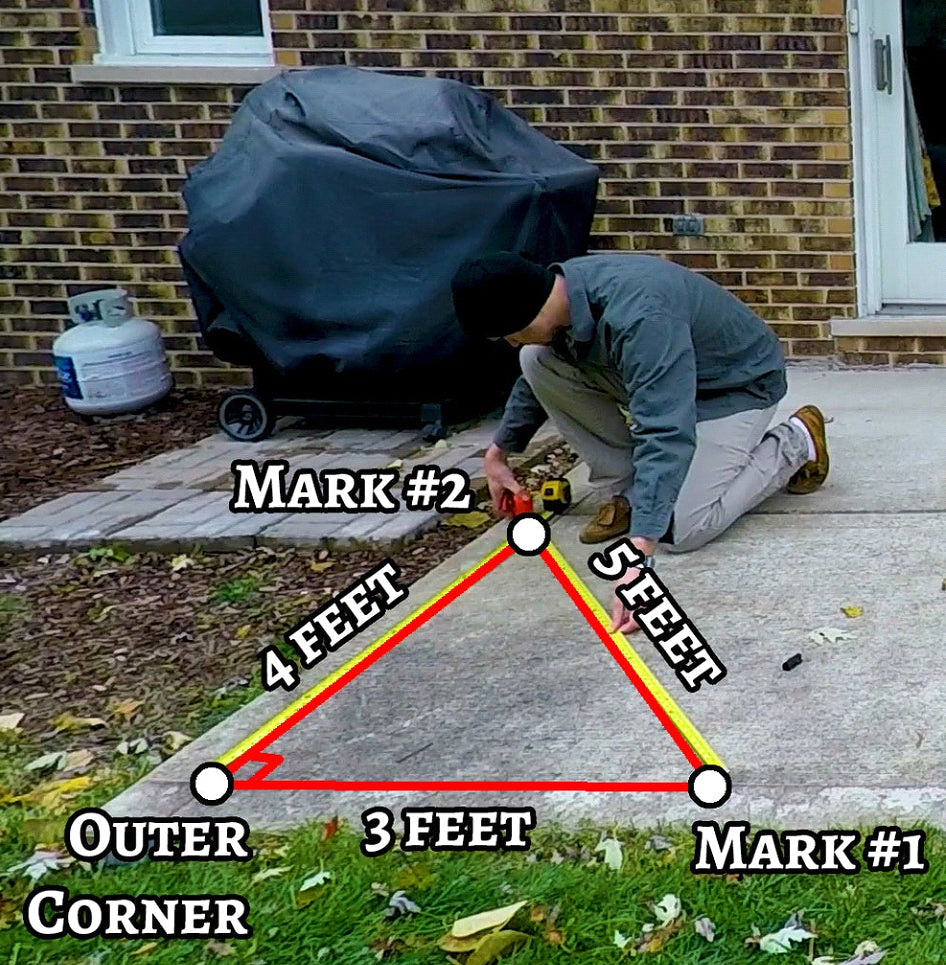
Once you have the location for the bolt down brackets, you will want to place and mark them in the proper position.

The Vita bolt down brackets require a ¼” x 2-3/4” Tapcon screw to secure to the concrete pad. You will require a 3/16” x 3” tungsten carbide concrete bit to drill the holes for the bolt down brackets.

What to use to drill concrete?
Can you use a regular drill to drill into concrete? It is possible to drill into concrete with an ordinary rotary drill. Rotary drills take longer to drill into concrete than hammer drills and more physical effort is required. One way to speed up the process and to avoid breaking the drill bit is to keep the bit cool.
Best Tools to use to drill concrete
-
Hammer Drill
A hammer drill has two discs that have ridges resembling the ridges on a poker chip (see Figure A). As one hammer drill disc slides past the other, it rises and falls, causing the chuck to slam forward and back. If there is no force on the chuck, the discs are separated by a clutch and the pounding action stops. This saves wear and tear. Many hammer drills can be used as a regular drill by switching off the hammering action.
-
Rotary Hammer Drill
A rotary hammer creates its pounding action with a piston driven by a crankshaft. The piston rides in a cylinder and creates air pressure when driven forward, and it’s the air pressure that drives the hammer mechanism. Rotary hammers provide a lot more impact energy than hammer drills. They’re much more durable and are the preferred tool of the pros. Another big advantage is that most rotary hammers have three settings: drill mode, hammer drill or just hammer, so they can act as a mini jackhammer. Of course, a rotary hammer costs more than a hammer drill, but more on that later.
Drilling into the Concrete
Step 1
Mark the desired position of the holes in pencil on the concrete surface and double-check their locations before you proceed. Also, during this planning and prep work, consider the drilling depth necessary for each hole. If your drill’s features include a stop bar, set it to the exact depth you want by following the drill manufacturer’s specifications. No stop bar feature? Instead, wrap a piece of masking tape around the drill bit to show you where to stop. Set your drill or mark your drill bit to the required depth. Always add ¼” to your depth to ensure the anchor has adequate depth.
Step 2
Don your goggles, then insert the appropriate tungsten carbide masonry drill bit for your desired hole size into the hammer drill. Next, get into position to drill by planting your feet firmly on the ground, shoulder-width apart. Hold your drill securely with both hands: Grip it in one hand like a handgun, and, if there’s no auxiliary handle for your spare hand, use that hand to brace the back of the drill.It’s critical to control the drill so it doesn’t run away once you begin work. When you lean in to bore the hole, the drill bit should be perfectly perpendicular to the concrete. Be prepared for some recoil from the drill’s hammer action.
Step 3
Make a guide hole first. Many hammer drills offer only two speeds, so turn your drill on at the slower speed for best control when making the guide hole. If your drill has only one speed, then work in short, controlled bursts of a few seconds each until you’ve established a hole. The guide hole needs to be just 1/8 to ¼ inch deep.
Step 4
When you start with a guide hole at least 1/8 inch deep, your drill will be easier to control, but all the same continue to operate the drill with a steady, light-but-firm touch so you’re never forcing it in. If you’re feeling confident, turn the speed to full, keeping a firm grip on the tool with both hands, and drill into the concrete until the hole is complete.Beware: Concrete can have air pockets and pebbles or stones that can make resistance unpredictable, with the result that it can be disturbingly easy to lose control of the tool for a moment
Step 5
If you hit obstructions, never force the drill farther into the concrete. This can damage the bits or drill or cause you to lose control of the drill and mess up your hole, damage the concrete surface, or worse.Whenever you reach any too-tough-to-crack spots that impede progress, set the drill down and grab the masonry nail and hammer. Put the tip of the masonry nail at the problem spot and give it a few taps—not hard whacks—with the hammer to break up the obstruction. When you’re done, resume drilling the concrete at a slow speed until you’re sure you’ve passed the rough patch.
Step 6
Periodically pull the drill out to brush away concrete dust. Considering you can bore a two-inch hole in under a minute using a hammer drill, pausing every 15 to 20 seconds should suffice.
Step 7
Once you have drilled your hole to the necessary depth, blow all the concrete dust out of the hole with a can of compressed air then vacuum up whatever has fallen to the ground. You should still be wearing your goggles throughout this process to protect against any concrete dust and shards that might fly in your face and scratch your eyes.
Step 8
Repeat this procedure for any other holes you need. Once through, a pass with a vacuum will make cleanup a breeze.
Once the holes are drilled you are ready to fasten the bolt down brackets to the concrete.
Ensuring you have the bolt down brackets in the correct position, attach the brackets to the concrete by using ¼” x 2-3/4” Philips or Star Head Tapcon Screws into the predrilled holes.
Once you have the bolt down brackets fastened you are ready for the next step, installing the 4 x 4 pressure treated post into the bolt down brackets.
Please also see our step-by-step Bolt Down Bracket video.
Hopefully by following the instructions listed, the installation of your bold down brackets will go smoothly, and installation of your pergola will give you many years of enjoyment.
Clair